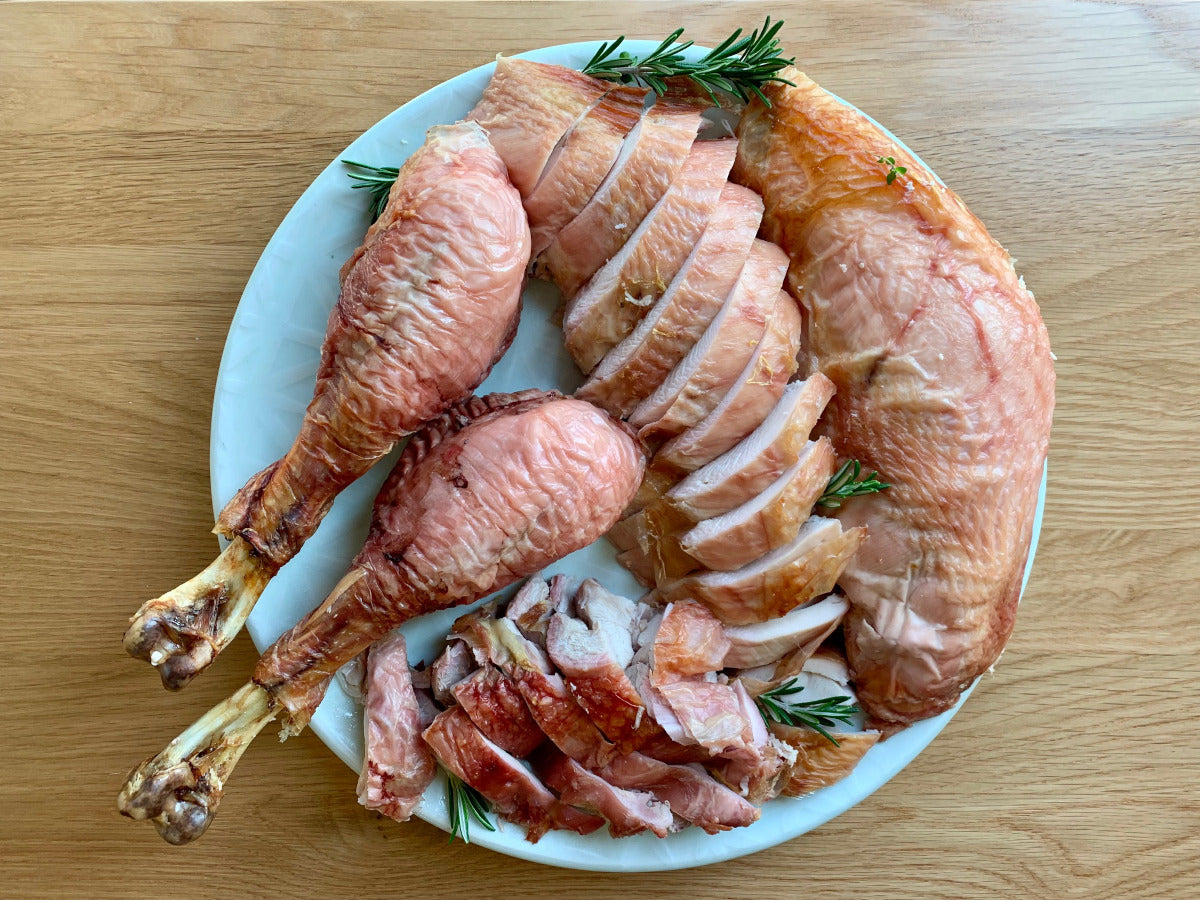
Halfcocked Turkey Recipe
An Unconventional Approach for Perfect Turkey: Pretend It’s a Chicken
One thing that always strikes me about turkey recipes is their assumption that there will be at least some compromise. Generally this means the breast will be overcooked in order to get the legs to reach a proper temperature. People try all sorts of things to mitigate this, like brining and putting ice packs on the breast prior to cooking or tinfoil over it at the start. More ambitious chefs may spatchcock the turkey, which makes it lie flat and cook more evenly.
But these are at best imprecise interventions, at worst cosmetic charms that have little actual impact on the finished bird. Quite simply, the shape of a turkey works against any and every effort to have it all finish cooking at once. But there is a much more straightforward approach: cut the turkey into pieces. Once the turkey is separated into breast, legs, and wings, nothing could be easier than pulling out each cut as it finishes roasting and not a moment before or after.
Better than Spatchcocked
The first and best objection to this is that cutting apart a turkey takes effort. True, so far as it goes. While a few minutes with a good chef’s knife will separate a whole chicken into individual cuts, a turkey is made of considerably sterner stuff.
A spatchcocked turkey or chicken is only half cut apart, with just the back removed. As noted, this lets it lie flatter, and cook more evenly, since it moves the legs from an insulated position tucked in close to the body to the outer edges, where they are exposed to more heat. But removing the back is the hardest part, far more difficult than cutting off the legs or wings, which require a little patience but no particular skill, strength, or special tools.
Enter the halfcocked turkey.
A halfcocked turkey is the inverse of a spatchcock. Don’t bother cutting out the back. Simply remove the legs and the wings and nothing else. You might need to get clever with some balls of aluminum foil to keep the breast section propped upright in the roasting pan, or you can flip it from one side to the other occasionally during cooking, but otherwise cooking is very straightforward.
(Update 10/13/2024: Though I mostly stand by what I've written above, I've since cut up a few more turkeys, and removing the back really isn't so difficult, and it's nice to have the breast portion balance itself and fit in the oven more easily. Watch this video for clear instructions, and simply cut off the legs and wings rather than leaving them attached. Not that you DO NOT need to remove the keel, which is the thin bone that separate the two sections of the breast. It's hard to do, and there's no point.)
I’ve already pointed out the benefit to this approach. As each piece reaches its target temperature, remove it to a platter. The breast won’t dry out, the thighs won’t be undercooked. After everything is ready and rested, simply carve, briefly warm back up if necessary, and serve.
The Other, More Dubious Objection
Some people like to bring the whole turkey to the table, its skin burnished to a glossy chestnut. I blame Dickens, with his description of roast goose, for cementing the idea in so many impressionable young minds that a whole fowl must be paraded before the guests prior to being carved and served. (Thinking about it, Dickens also bears some responsibility for muddying the waters when it comes to proper stuffing, though I suppose we must give him some leeway as a product of his time.)
I simply ask whether observing this ritual justifies a poorly cooked turkey, particularly if you intend to take a pragmatic approach to carving, which does not involve using a ceremonial fork and dull, silver-handled knife, to mangle a dried out, rapidly cooling turkey while a line of impatient guests look on. If you instead follow an easy series of steps guaranteed to efficiently get the most meat possible off the turkey, you should do so in the kitchen, with the goal of a beautifully arranged platter, ready to serve the moment all the trimmings have hit the table.
The One Tool You Need
The whole premise of a halfcocked turkey is that you can bring out each section once it’s perfectly cooked, and not a moment before or after. While you can judge this by poking, prodding, and making the occasional exploratory cut, far better is to invest in a good digital thermometer. I promise you will not regret it!


1 comment
For the past 5 years this has been my go to method for cooking the perfect turkey. Excited for tomorrow.